This week’s blog post comes a few days earlier than usual. This is because I have a military exercise starting tomorrow, which means I won’t get any work done until next weekend. However, my SOCIS project has reached its first milestone, and I will dedicate this post to a demonstration of the project’s current state. This demonstration will be a bit more detailed than the one from week 3, so everyone can try out my changes. I will show you a simple flow graph with two signal sources, an add block, a throttle block and a file sink.
First of all, you’ll have to clone my repository with the following commands:
git clone https://github.com/hauk142/gnuradio.git
cd gnuradio
Second, switch to my python3_demo branch and checkout VOLK:
git checkout python3_demo
git submodule init
git submodule update
Next, you are ready to build GNU Radio. For the purpose of this demonstration, the CMake command below disables some components. Feel free to enable them, but it’ll cost you some time when building.
mkdir build
cd build
cmake .. -DENABLE_GR_COMEDI=OFF -DENABLE_DOXYGEN=OFF -DENABLE_GR_DTV=OFF -DENABLE_GR_DIGITAL=OFF -DENABLE_GR_FEC=OFF -DENABLE_GR_UHD=OFF -DENABLE_GR_TRELLIS=OFF
make
After make finishes, you are ready to install and run GRC:
sudo make install
export PYTHONPATH=/usr/local/lib/python3.6/dist-packages/
export LD_LIBRARY_PATH=/usr/local/lib/
gnuradio-companion
The two ‘export’ commands will have to be run every time you run GRC in a new terminal. You can put them in a shell script for easy access, but remember that you need to use source for it to work.
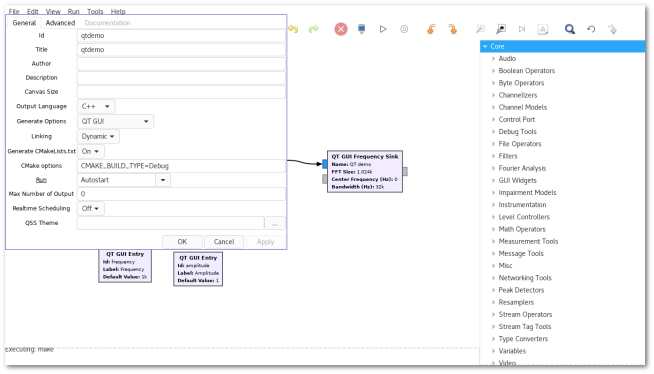
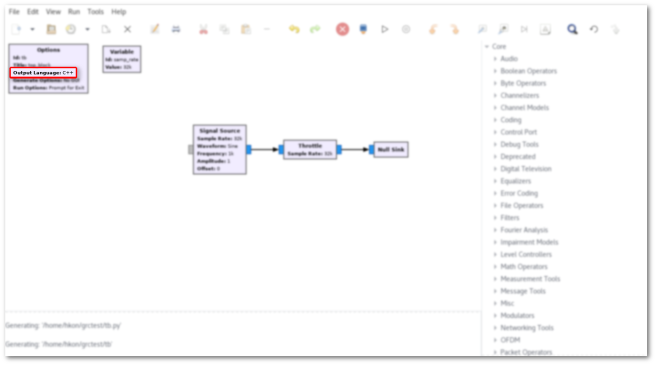
Now GRC should be open and you can continue by opening a file called fsink.grc. You can find it in the demonstration directory from the cloned GitHub repository.
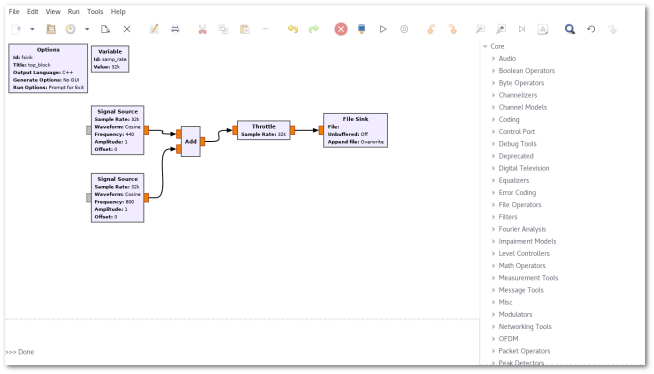
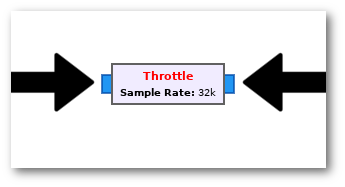
Your screen should look something like the image above. This flow graph is almost ready to be executed, all you have to do is double-click the file sink and choose in which file you want your signals to end up. Next, you can press the “play” button at the top, and dismiss the warning. GRC will freeze for a few seconds (will be fixed), and a terminal will appear:
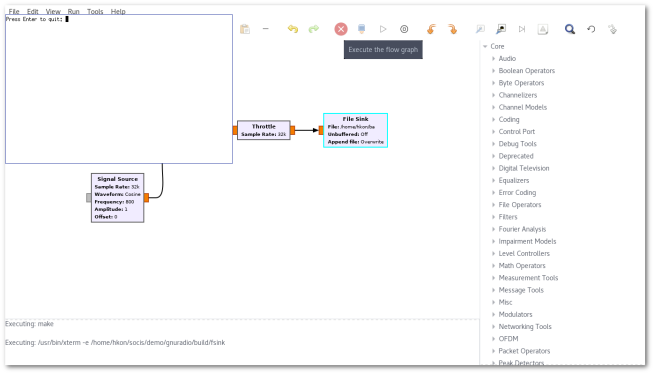
Congratulations, you’ve just generated, built and executed your first program with GRC’s brand new C++ output functionality!
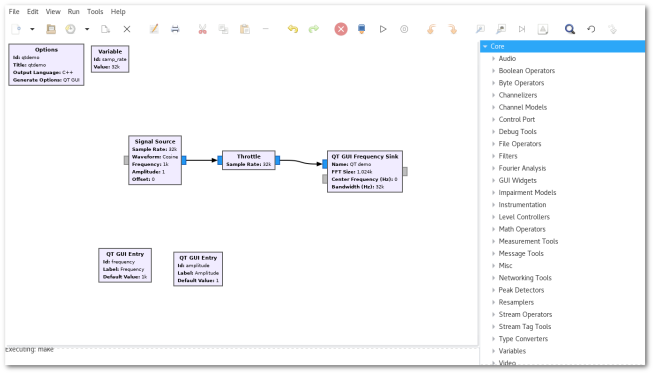
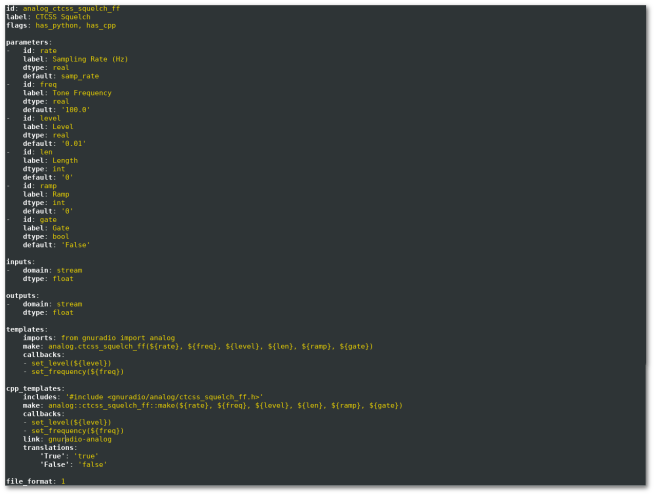
It might seem like nothing’s happening, but actually, GNU Radio is filling your selected file with the output from the signal sources. You can press Enter to quit and the file can now be inspected however you’d like. You might notice an error upon pressing Enter. This is an issue that will be fixed once I figure out the cause. Please note that I haven’t added support for GUI flow graphs yet, so you won’t be able to create a flow graph with a file source and a QT plot to view the contents of the file. Also, I have only added a few YAML blocks in this branch, but you can find more in my grc_yaml_blocks repo.
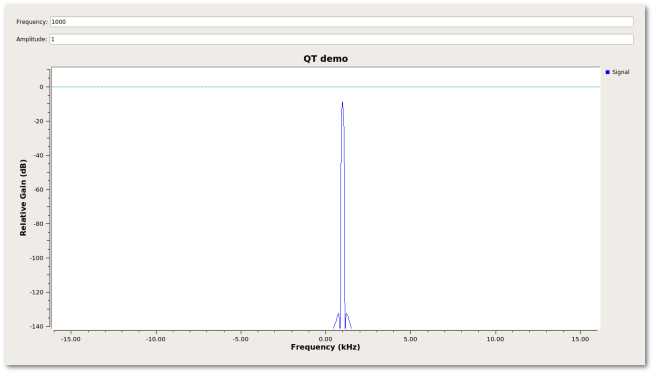
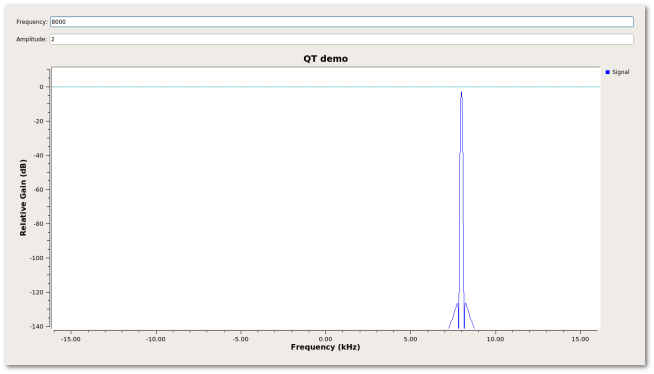
I modified the display_qt example from the gr-qtgui module, opened the file, and got this plot:
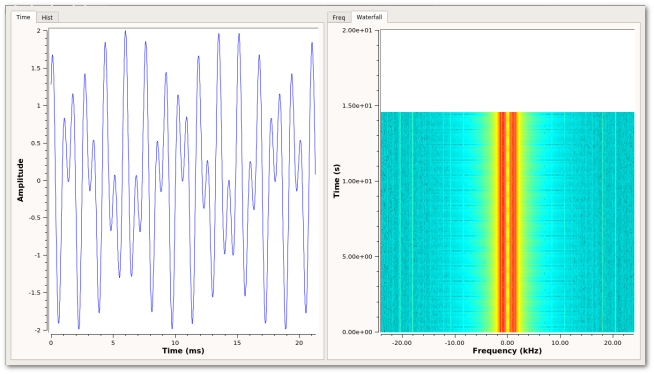
I have included this program in the plot directory in my python3_demo branch, and you can run it like this:
cd plot
mkdir build
cd build
cmake ..
make
export PYTHONPATH=/usr/local/lib/python3.6/dist-packages/
export LD_LIBRARY_PATH=/usr/local/lib/
./display_qt ‘/home/hkon/signals’
Where signals is the file you generated with GRC.
So that’s it! I hope, if you tried to follow my steps, that you managed to get through the demonstration without running into an error you couldn’t resolve (and if you did, please don’t hesitate to ask) 🙂 The next step for my SOCIS project is adding support for GUI flow graphs.
